
There’s nothing quite like crafting a café-quality coffee in your own kitchen. For me, learning how to steam milk on my Breville Barista Express was a pivotal step in taking my coffee-making skills to the next level. My initial attempts didn’t always go as planned, often leading to a frothy disaster instead of that silky microfoam we all crave. But with time, patience, and practice, I found my groove. If you’re finding the steam wand tricky or you just want to refine your skills, here’s my personal guide to steaming milk like a seasoned barista. If you're also interested in checking out related Breville models, you might find my Breville Dual Boiler BES920XL Review, Breville Barista Touch Impress Review, and Breville Barista Express Impress vs Pro articles helpful as they provide additional insights into the different Breville espresso machines that can elevate your coffee-making experience.
Know Your Machine Inside and Out
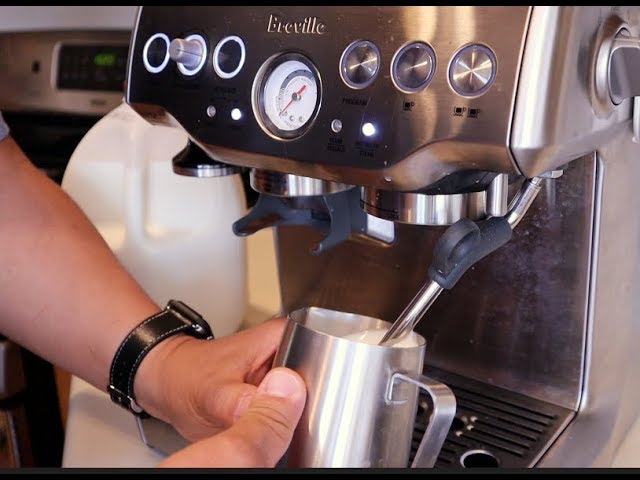
The Breville Barista Express is a fantastic machine for making café-level coffee at home, and a key feature is its steam wand. With its 360-degree swivel, the wand provides flexibility in positioning, allowing you to control milk texture precisely.
Before anything, make sure your machine is fully heated. The Barista Express has indicator lights that let you know when it’s ready to steam. Skipping this step and using an under-heated machine can negatively impact the milk’s texture. Trust me, I learned that the hard way!
Choosing and Prepping the Right Milk
Choosing the right milk is crucial for achieving that perfect foam. Whole milk gives a richer, creamier result thanks to its higher fat content, while skim milk produces a lighter foam. If you prefer plant-based milk, varieties like almond, soy, or oat can also be frothed—just know they behave a bit differently due to lower protein and fat content.
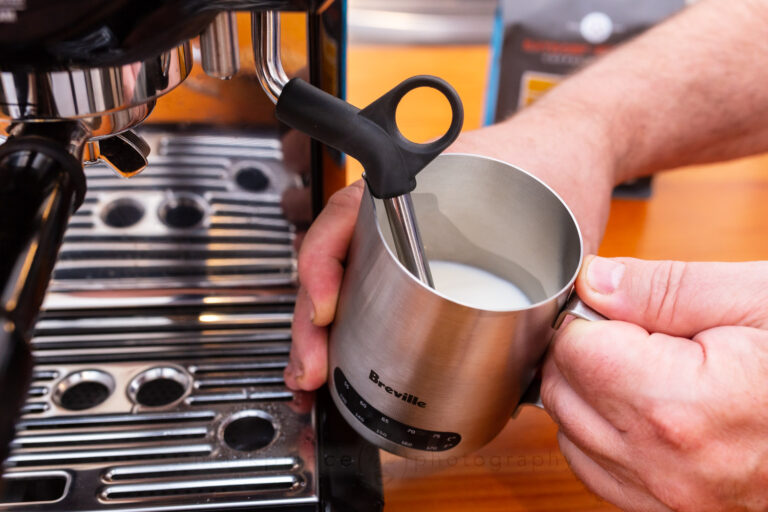
I always use a stainless steel jug, as it conducts heat well, allowing you to feel the temperature by touch. For a single serving, a 12-ounce jug works perfectly, and I recommend filling it with cold milk up to about one-third of the way. Using cold milk gives you more time to perfect your technique before the milk overheats.
Step-by-Step: How to Steam Milk on the Breville Barista Express
Purge the Steam Wand
Before you even touch the milk, turn on the steam wand for a moment to purge any condensation. Starting with dry steam is essential for creating a smooth microfoam.
How to Steam Milk Step-by-Step
Purge the Steam Wand
Before inserting the wand into the milk, turn it on briefly to purge any condensation. This ensures you're starting with dry steam, which is key to creating good foam.
Positioning the Steam Wand
Submerge the tip of the steam wand just below the milk’s surface, near the jug’s spout. Holding the jug at a slight angle will help create a whirlpool effect, essential for achieving smooth, even texture.
Incorporating Air (Stretching the Milk)
Turn the steam knob to full power. You’ll hear a hissing sound as air gets incorporated into the milk. Keep the tip of the wand just below the surface for the first few seconds to introduce air into the milk—this is known as "stretching." Be careful not to introduce too much air, or you’ll end up with large bubbles instead of the fine microfoam you want.
Texturing the Milk
Once you’ve incorporated enough air (usually after 5 seconds), raise the jug slightly to submerge the steam wand fully. This allows the milk to continue swirling and heating while breaking down any larger bubbles. The goal is a smooth, velvety texture that looks shiny, similar to wet paint.
Monitoring the Temperature
You can gauge the milk’s temperature by touch—when the jug becomes too hot to hold (around 150°F or 65°C), it’s time to stop steaming. For more precision, a thermometer can be useful. Overheating can cause the milk to scald, leading to a burnt taste and loss of sweetness.
Shutting Off the Steam
Before removing the steam wand from the milk, turn it off to prevent splattering. Once the steam is off, carefully remove the wand from the jug.
Position the Wand Correctly
Submerge the tip of the steam wand just below the milk’s surface, positioning it near the jug’s spout. I like to hold the jug at a slight angle to create a whirlpool effect, which is key for achieving a smooth, even texture.
Incorporate Air (Stretching the Milk)
Turn the steam knob to full power, and you’ll hear a telltale hissing sound as air begins to incorporate into the milk. Keep the wand tip just under the surface for the first few seconds—this is the "stretching" phase. Be careful not to introduce too much air, though, as that will lead to large, undesirable bubbles instead of fine microfoam.
Texture the Milk
After about 5 seconds of stretching, raise the jug slightly to fully submerge the steam wand. At this stage, the milk will continue to heat and swirl, breaking down any larger bubbles and creating that velvety texture we’re aiming for. The ideal result is a smooth, shiny finish, much like wet paint.
Monitor the Temperature
To avoid overheating, I rely on touch. When the jug becomes too hot to hold (around 150°F or 65°C), it’s time to stop. If you prefer more precision, a thermometer is handy. Just don’t let the milk go over 170°F (77°C), as that will scald it, leaving you with a burnt taste and ruined sweetness.
Shut Off the Steam
Before removing the steam wand, turn it off to prevent any splatter. Then, carefully remove the wand from the jug.
Finishing Your Steaming Process
Tap and Swirl for Perfection
Once the milk is steamed, tap the jug gently on the counter and swirl it around. This helps eliminate any remaining larger bubbles and ensures a smooth, glossy texture.
Clean the Wand Immediately
This part is crucial: after each use, wipe down the steam wand with a damp cloth and purge it again. Leaving milk residue can cause buildup and clog the wand, which will affect performance over time. Trust me, you don’t want to skip this.
Pour with Precision
When it’s time to pour your steamed milk, tilt your cup slightly and pour steadily into the center. Starting from a higher point mixes the milk with the espresso, while lowering the jug as you pour allows you to create latte art. If you’re feeling adventurous, practice making simple designs like hearts or leaves. It takes time, but the results are worth it.
My Best Tips for Steaming Milk
Practice Makes Perfect
Steaming milk is an art that requires repetition. Each type of milk behaves differently, so experimenting with different types can help you refine your skills.
Fresh Milk Is Best
Fresh milk froths much better due to its higher protein content. Always check the expiration date, and avoid using milk that’s been open for too long.
Try Different Milk Types
If you’re experimenting with plant-based alternatives, don’t be discouraged if your first few tries don’t work out perfectly. Barista-style oat or almond milk is specially designed for frothing and is a great starting point.
Mistakes to Avoid
Over-Aerating the Milk
Incorporating too much air leads to a frothy, bubbly mess rather than the creamy, silky microfoam we’re aiming for. Less is more here.
Overheating the Milk
Milk starts to scald at around 170°F (77°C). Any hotter, and you’ll lose that lovely sweetness that makes steamed milk so delicious.
Skipping Wand Purging and Cleaning
This is a hygiene issue as much as it is a performance one. Failing to clean the steam wand regularly can lead to milk buildup, reducing your machine’s efficiency.

Conclusion: Transform Your Coffee Experience
Learning to steam milk on the Breville Barista Express has elevated my home coffee game. The ability to craft a creamy, delicious latte or cappuccino from start to finish is incredibly satisfying. Though it may seem intimidating at first, with a bit of practice, you’ll be whipping up silky-smooth microfoam in no time.
Understanding your equipment and perfecting your technique is key. Once you get the hang of it, you’ll find yourself enjoying coffee that rivals your favorite café creations. So, fire up that machine, grab your milk jug, and get steaming—you’re well on your way to mastering the perfect cup of coffee right at home! If you're comparing models, make sure to check out our insights on Breville Barista Pro vs Express and Breville Oracle vs Oracle Touch to help you make an informed decision.